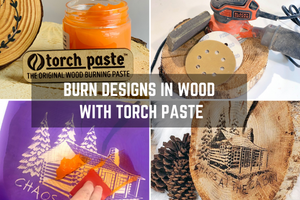
Torch Paste - The Original Wood Burning Paste was formulated to minimize leaks under stencils so that even the least artistic person can wood burn beautiful designs on wood. This patent-pending paste works perfectly with reusable or vinyl stencils on a wide variety of wood types and surfaces. Here are a few of my tips when using Torch Paste on rough wood.
TIPS FOR USING TORCH PASTE ON ROUGH WOOD
As an avid crafter and wood working enthusiast with NO artistic abilities, using stencils with Torch Paste is my go-to for fun and easy DIY craft projects.
Most of the surfaces we use in our shop are various types of salvaged or reclaimed wood, which means uneven or rough surfaces. Sometimes the stencils have a little trouble sticking to these types of textured surfaces, but no worries! Here are a couple tips and tricks that we use in our shop when using Torch Paste on rough wood and I hope they help you as well.


- PREP THE WOOD: The most important step when stenciling on rough wood is to sand your wood first. We sand our wood surfaces using 220 grit sand paper. If it's a high-kind-of-energy day then I will sand by hand, otherwise I use an orbital sander (as you can see from the photo the orbital sander is used often!). After you are done sanding, wipe away any debris with a dry cloth.
- WARM THE WOOD: Before applying your stencil, warm up the wood surface with your heat gun or hair dryer. The trick here is not to make the surface too hot, but just right. Did Goldie Locks just come to mind or was that just me in grandma story-telling mode? :)
- APPLY THE STENCIL: Firmly apply the reusable or vinyl stencil to the wood. The warmth of the wood will help to warm the adhesive and help the stencil stick a bit better to the wood. We also like to use a squeegee (or old credit card) to help apply pressure to the stencil and ensure there are no air bubbles for the Torch Paste to sneak under.
- APPLY THE PASTE: After the stencil is firmly applied, you are ready to add the Torch Paste. Apply a thin layer of Torch Paste onto the stencil. Use a squeegee to make sure your paste is pushed through all the mesh openings. Remove the stencil and allow Torch Paste to absorb/dry for about two minutes. While the paste is drying you can wash your reusable stencil. Torch Paste doesn't break them down any faster or differently than any other ink, paint, chalk or etch cream.
- BURN BABY BURN! Use a heat gun to reveal the magic burn and watch your design come to life! We recommend a heat gun that is at least 1000W. Burn until all the orange paste transforms to dark brown.
 .
.  .
. 
WHERE TO BUY TORCH PASTE
Torch Paste is now available to purchase directly from Torch Paste.
Ann Lanfair
Torch Paste, CEO
Facebook: Torch Paste
Instagram: @torchpaste
YouTube: Torch Paste
